Set Up and Manage Asset Versions
When you have a new cut or revision, add it as a version of the original rather than uploading it as a separate asset. Versions keep every iteration, and all of its feedback, stacked together under one parent, so the review history stays in one place. From there you can promote any cut to be the main version everyone sees first.
Add a version
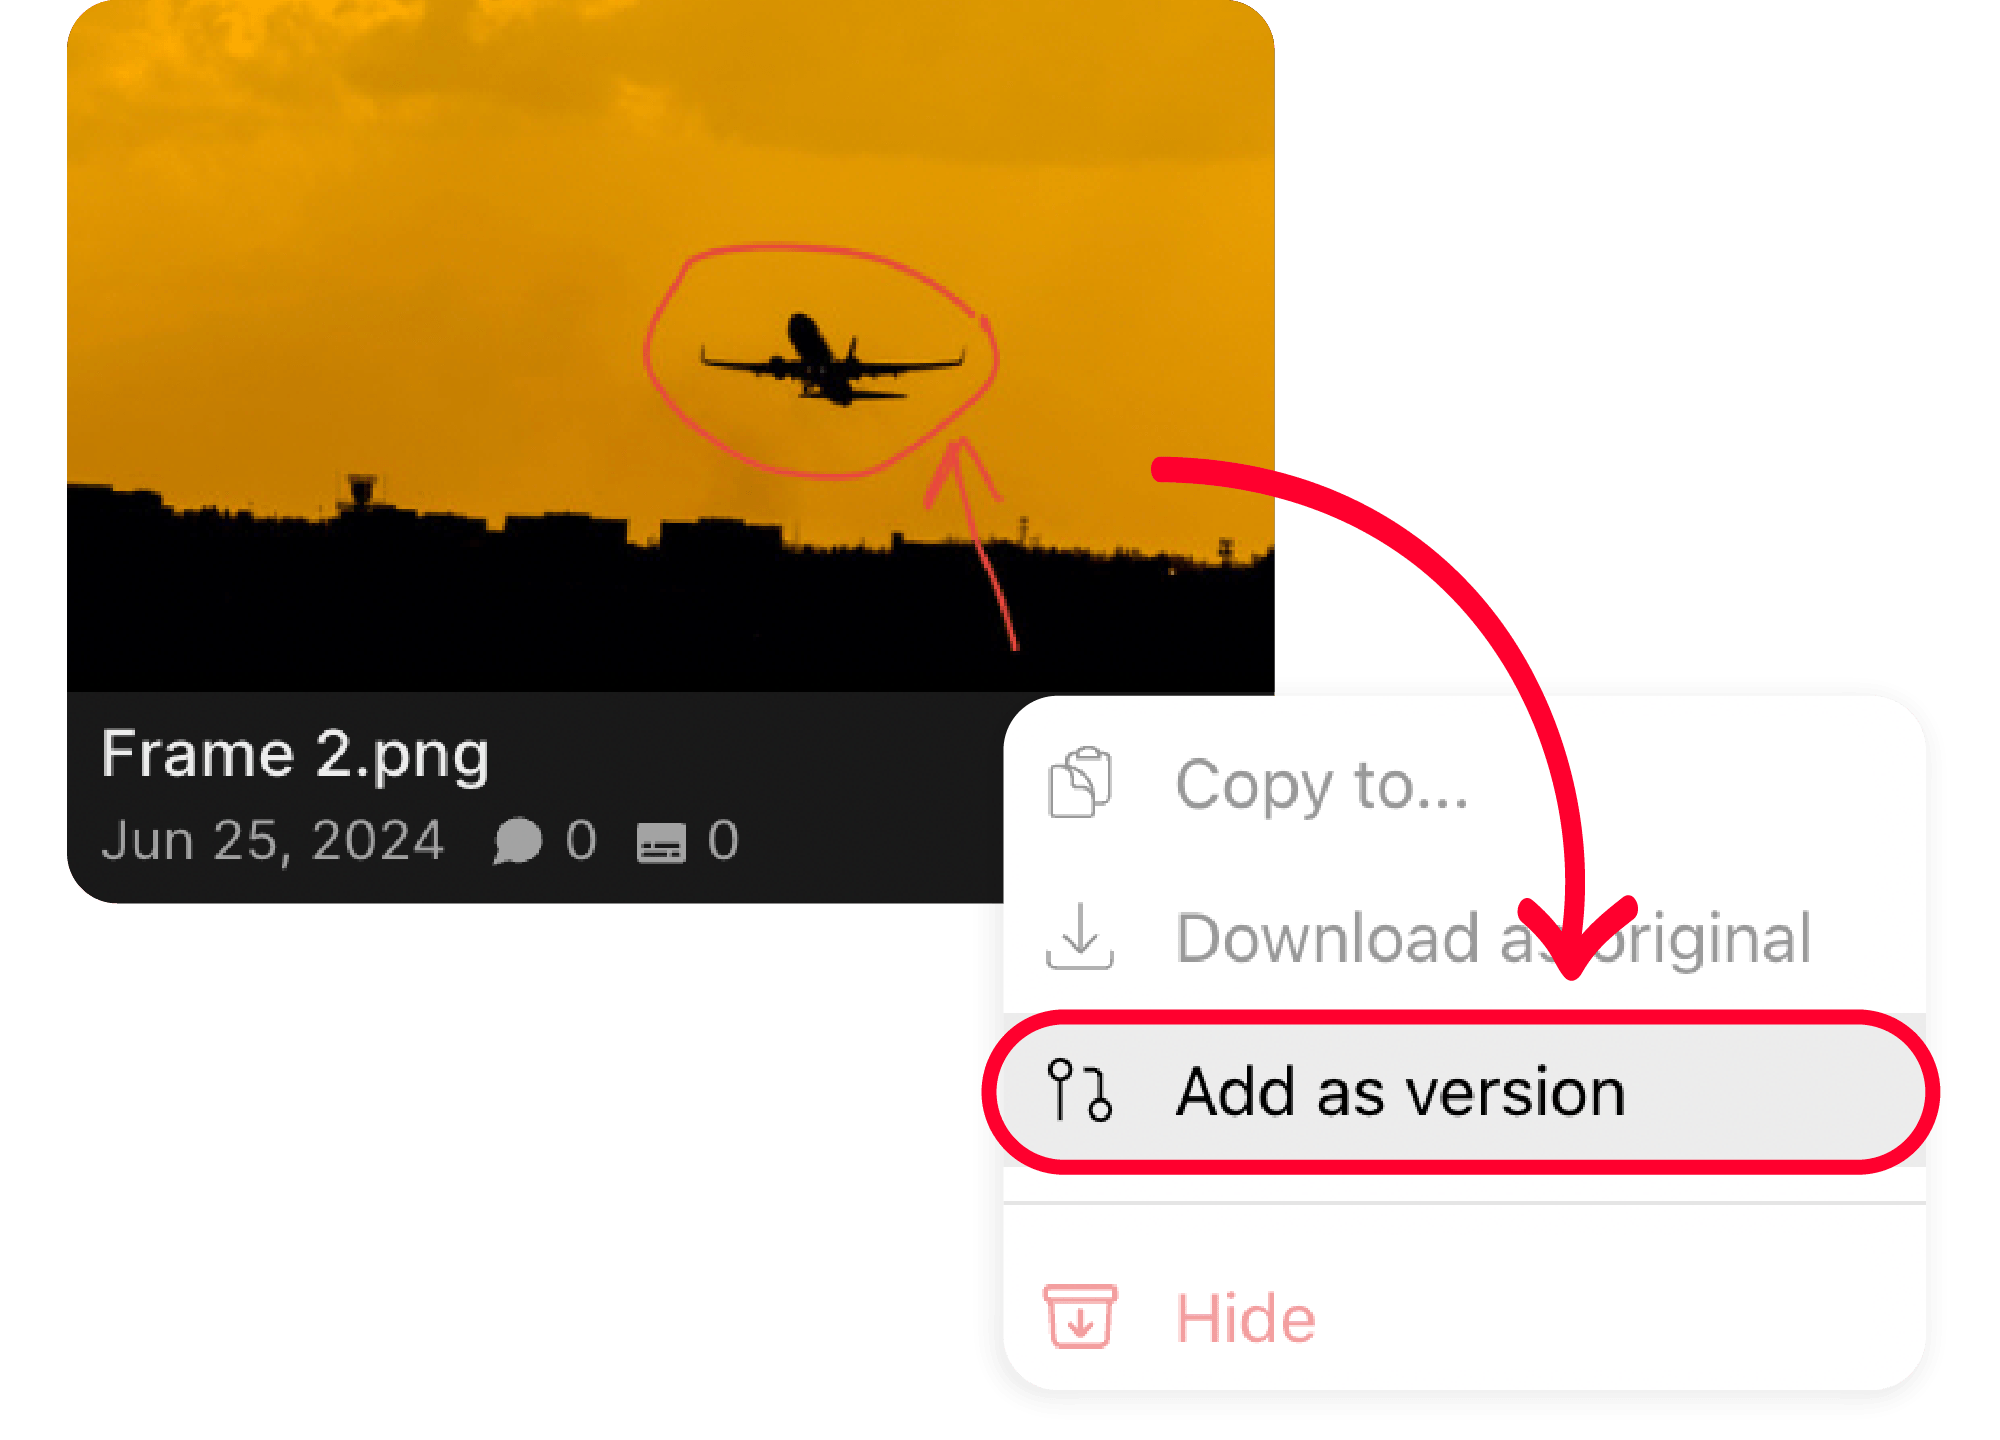
From the asset menu
- Click the three-dot menu of the asset you want to turn into a version
- Select Add as a version
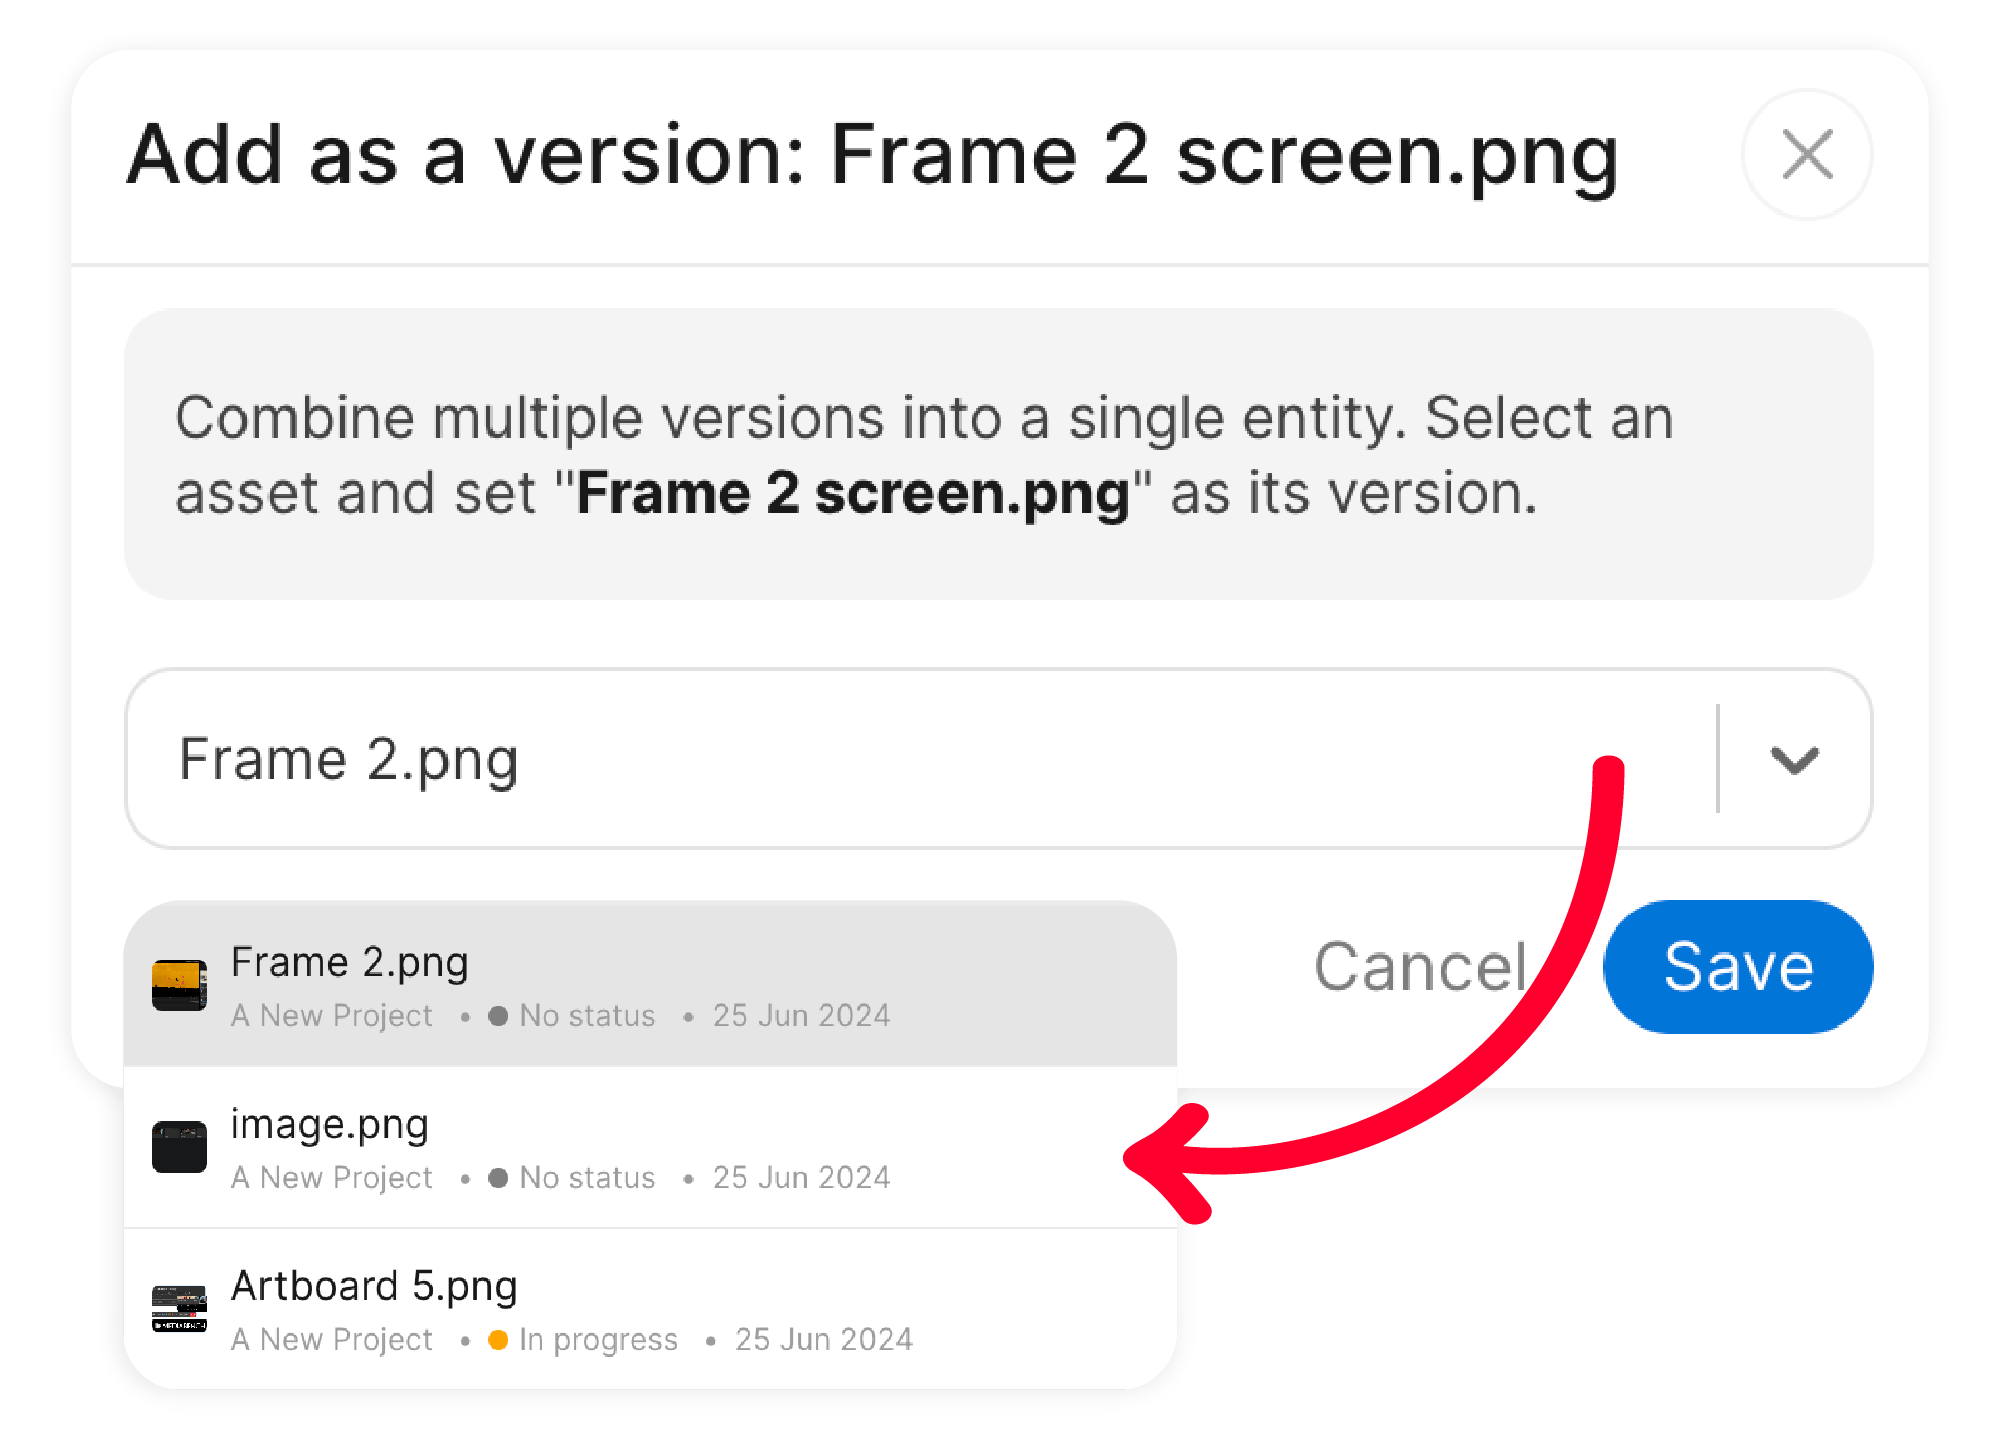
- In the Asset name field, type the parent asset's name, or click the down arrow to choose from your assets
- Select Save
Or drag and drop
Drag one asset card directly onto another. When the Add as version overlay appears on the target card, drop it to stack the two together.
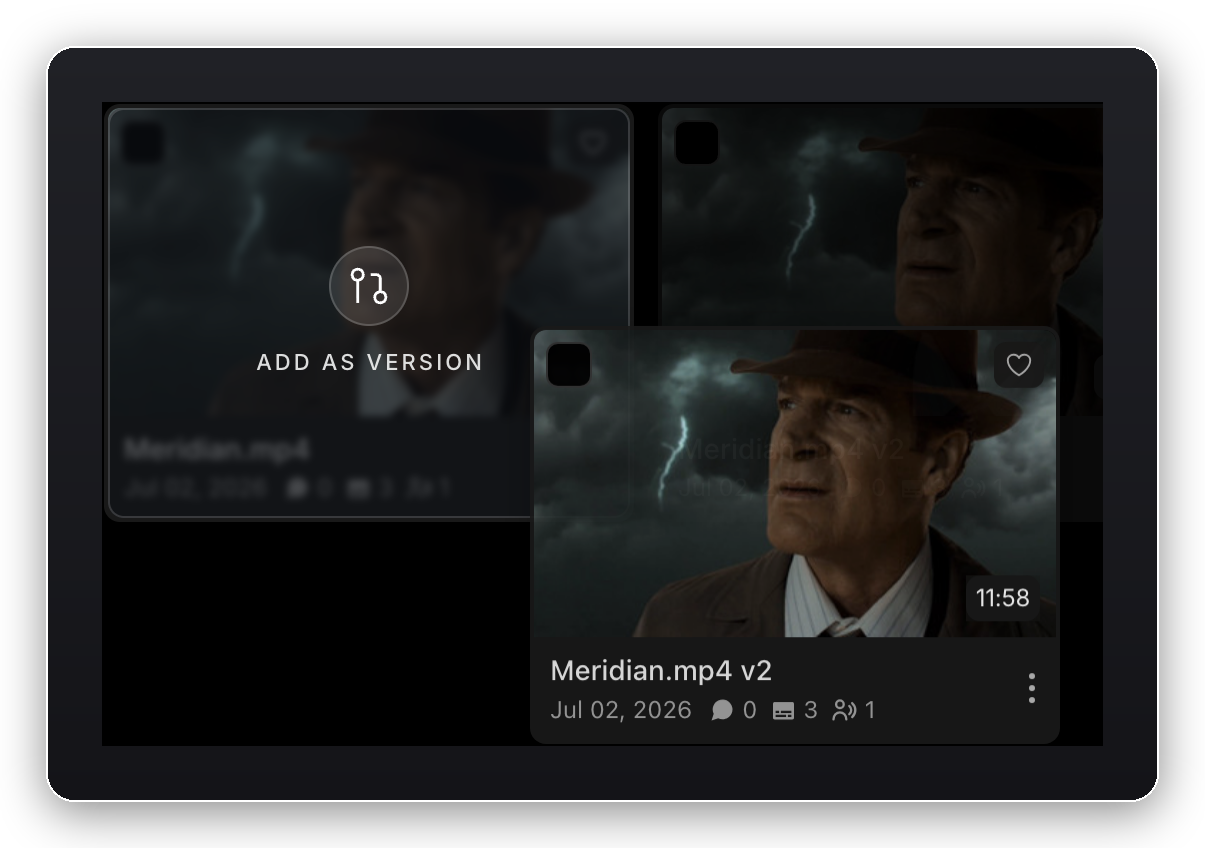
Either way, the asset now sits in the parent's version stack.
Change the main version
The main version is the one MediaBench shows first and uses as the asset's preview. When a newer cut becomes the one to share, promote it so everyone lands on the right version by default.
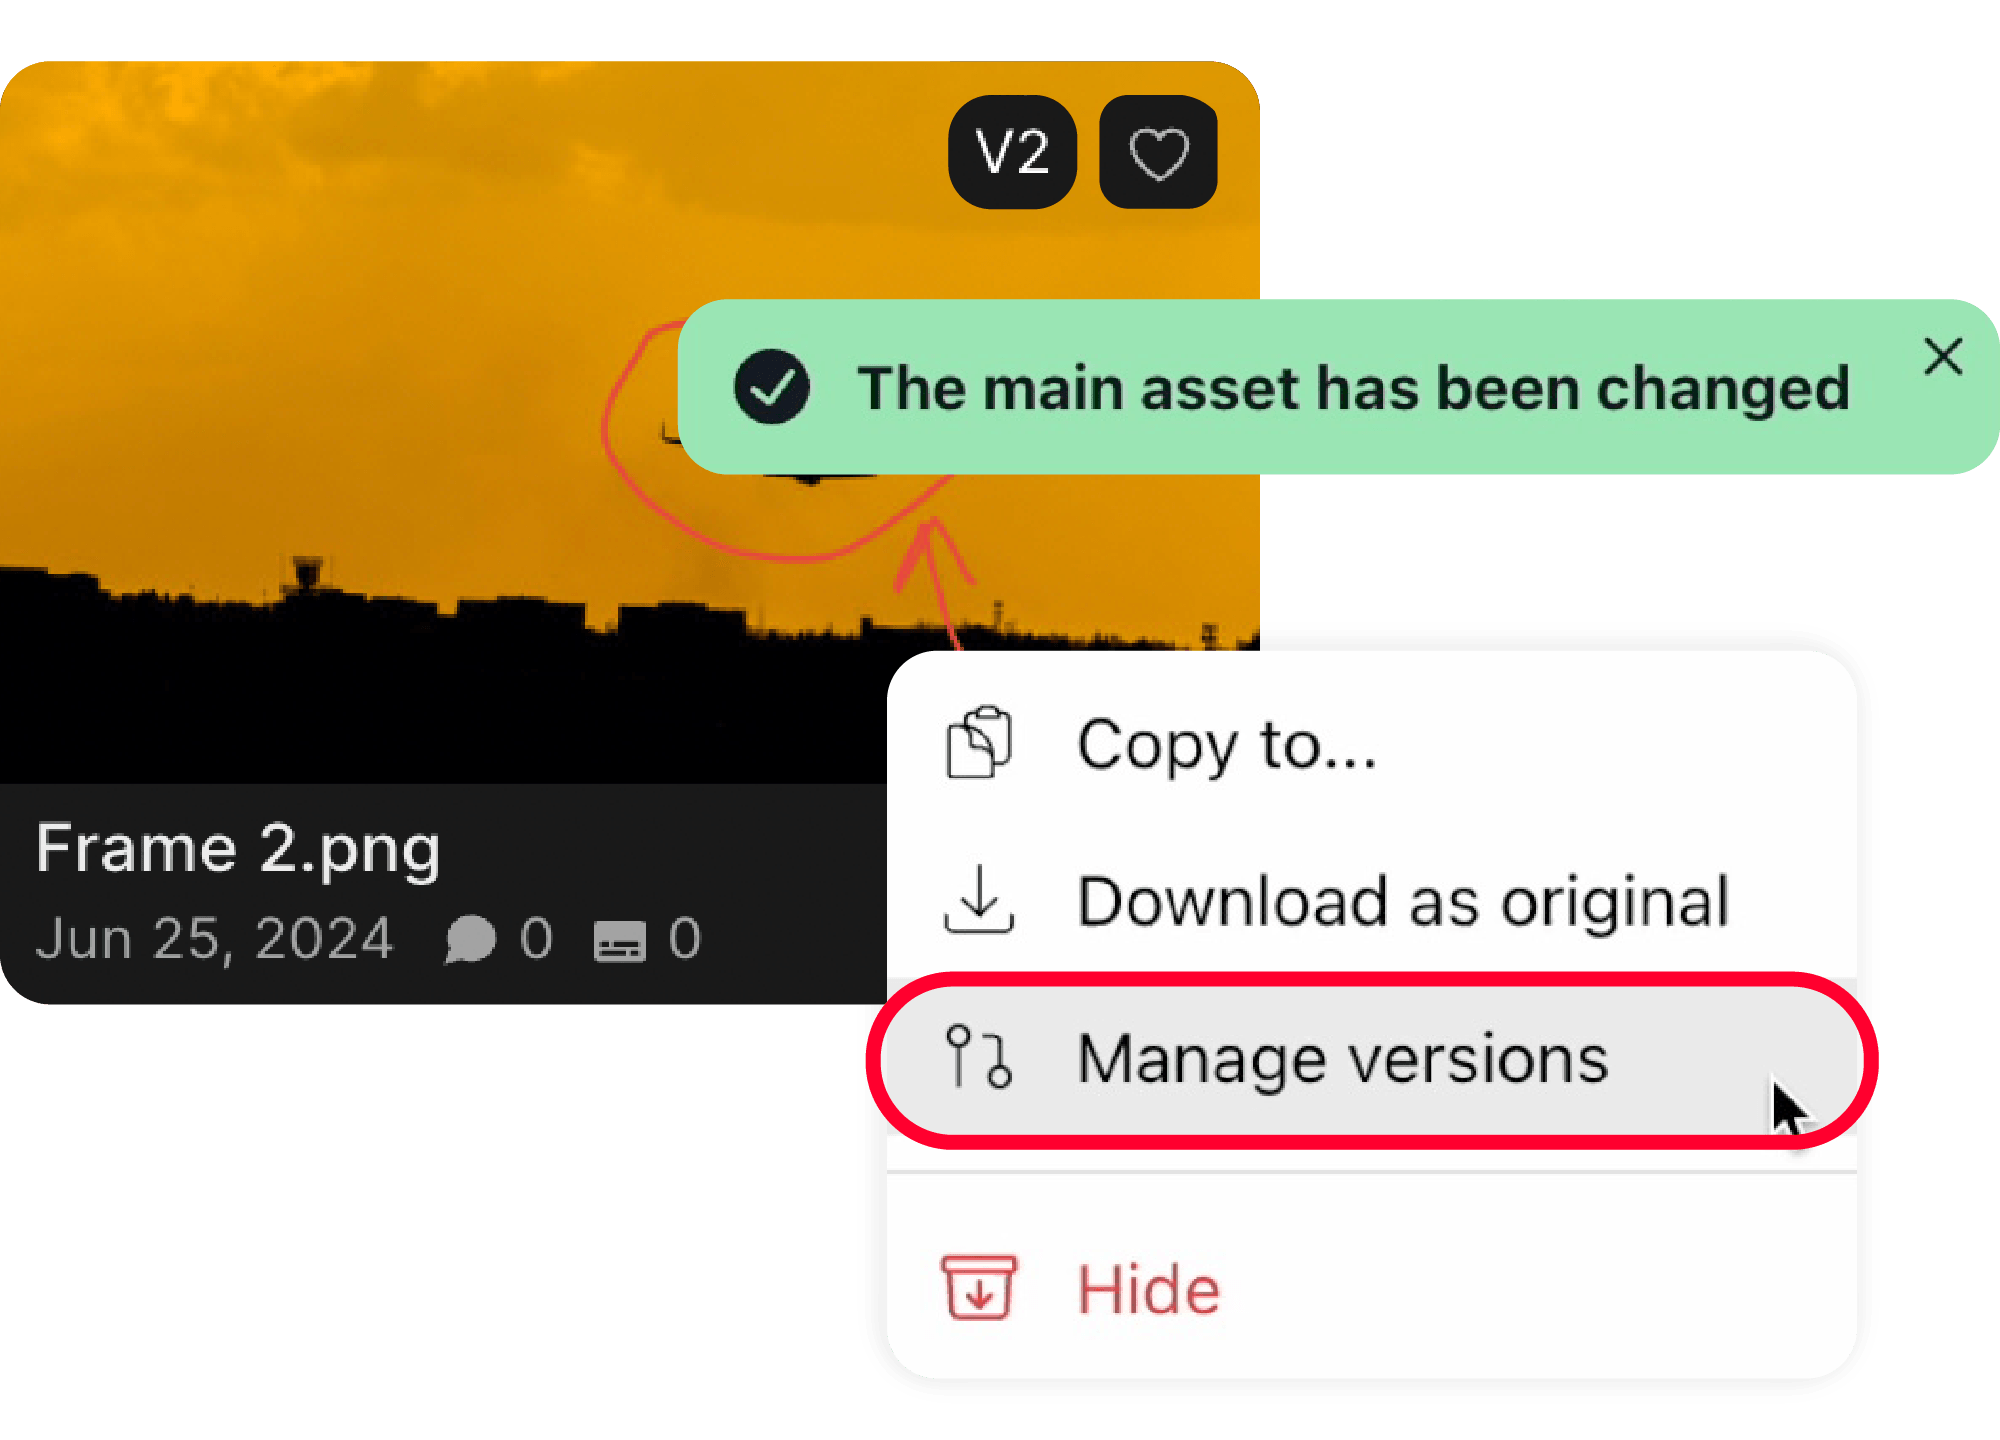
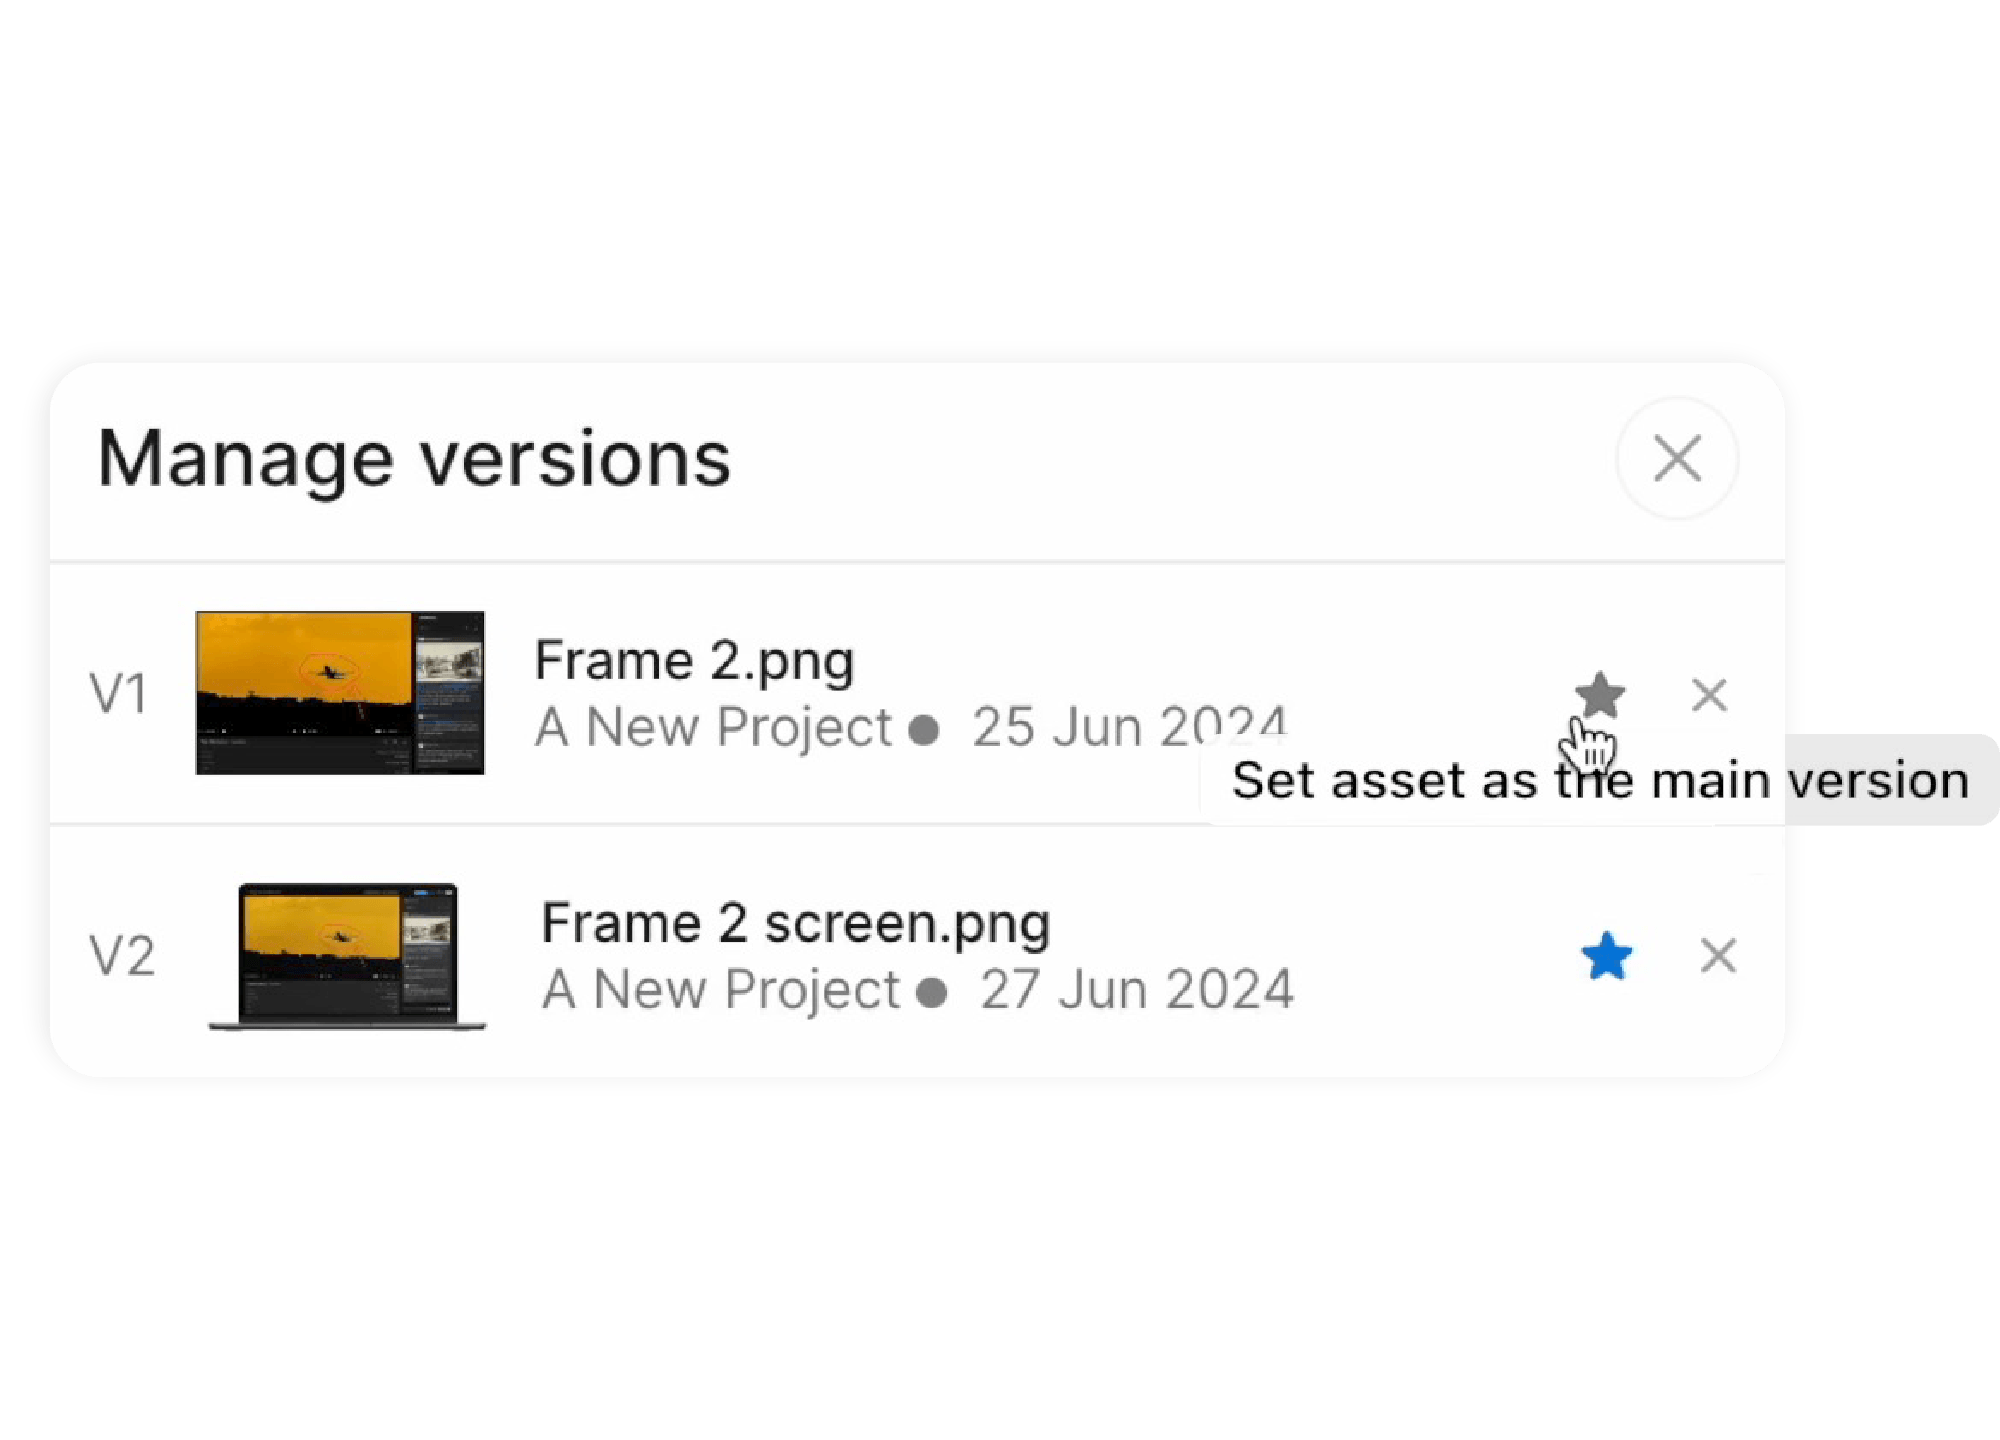
- Click the three-dot menu of the asset
- Click Manage versions
- Select the star icon next to the version you want as the main one